Planning a backpacking trip is really eight decisions made in the right order. Get the order wrong — buy gear before you know the route, or pick dates before you check permits — and you end up redoing work or cancelling. This guide walks the sequence from first idea to the morning you leave, and shows how to keep the whole plan in one place instead of scattered across screenshots, a spreadsheet and a group chat.
The short version
Dates and people → route and daily segments → permits → gear list and pack weight → water and food → offline maps → trip plan sent home. Everything else is detail.
1. Pick the trip, not just the trail
Before you open a map, answer four questions: when, how many nights, who is coming, and what kind of trip is this. These four constrain everything downstream, and changing any of them later usually means starting over.
The most common beginner mistake is planning for the fittest person in the group. Your plan has to work for the slowest member on the third day with wet boots. If you have someone on their first overnight, cap the trip at one night and keep the total distance under about eight miles round trip.
Be honest about the trip type too. A shoulder-season alpine traverse and a summer lakeside overnight are both "backpacking", but they need different gear, different margins and different bail-out planning.
Questions worth settling on day one
- Dates and flexibility. Can you shift a weekend if the permit or the forecast says no?
- Group size. Many wilderness permits cap group size at 8–12 people, and larger groups move measurably slower.
- Experience floor. The least experienced person sets the difficulty ceiling.
- Bail-out tolerance. Do you need a route with an early exit, or is a point-to-point acceptable?
2. Choose and measure the route
Now find the route. What you need out of this step is not a pretty photo — it is three numbers: total distance, total elevation gain, and where you can legally camp. A 22-mile loop with 2,000 feet of gain and three established camps is a very different trip from a 22-mile loop with 7,000 feet of gain and one legal site.
Break the route into daily segments immediately. Each segment ends at a camp, and each camp needs water within reasonable reach. If you cannot draw the segments, you do not yet have a plan — you have a trail you like.
Cross-check your source. Trail conditions change, bridges wash out, and a GPX file from three years ago may route you through a closure. Check the managing agency's current alerts page for the wilderness or park before you commit.
Have a GPX file already?
If a friend, a guidebook site or a trail association gave you a GPX track, you can import it straight onto your phone rather than redrawing it. See how to import a GPX file on iPhone.
3. Set realistic daily mileage
This is where most trips go wrong. People plan by distance alone, ignore elevation, and end up hiking the last two miles by headlamp. Use a pace model instead.
A practical rule: assume 2 miles per hour on moderate trail with a loaded pack, then add 30 minutes for every 1,000 feet of elevation gain. Subtract 15–25% of your speed for a group of five or more, for scrambly terrain, or for anyone carrying more than about 30% of their body weight.
| Experience level | Comfortable daily distance | Sensible gain per day |
|---|---|---|
| First overnight | 4–6 miles | Up to 1,000 ft |
| Occasional backpacker | 7–10 miles | 1,500–2,500 ft |
| Experienced, conditioned | 12–18 miles | 3,000–4,500 ft |
Always make day one the shortest. You will leave later than you planned, the trailhead drive will take longer than you planned, and your pack is at its heaviest before you have eaten anything.
Once you have your daily distances, turn them into an actual schedule with times — wake, break camp, water stop, arrive at camp. A schedule exposes the day that does not fit before you are standing on it. There is a full walkthrough in the multi-day hike itinerary guide.
Doing this in GoVenture
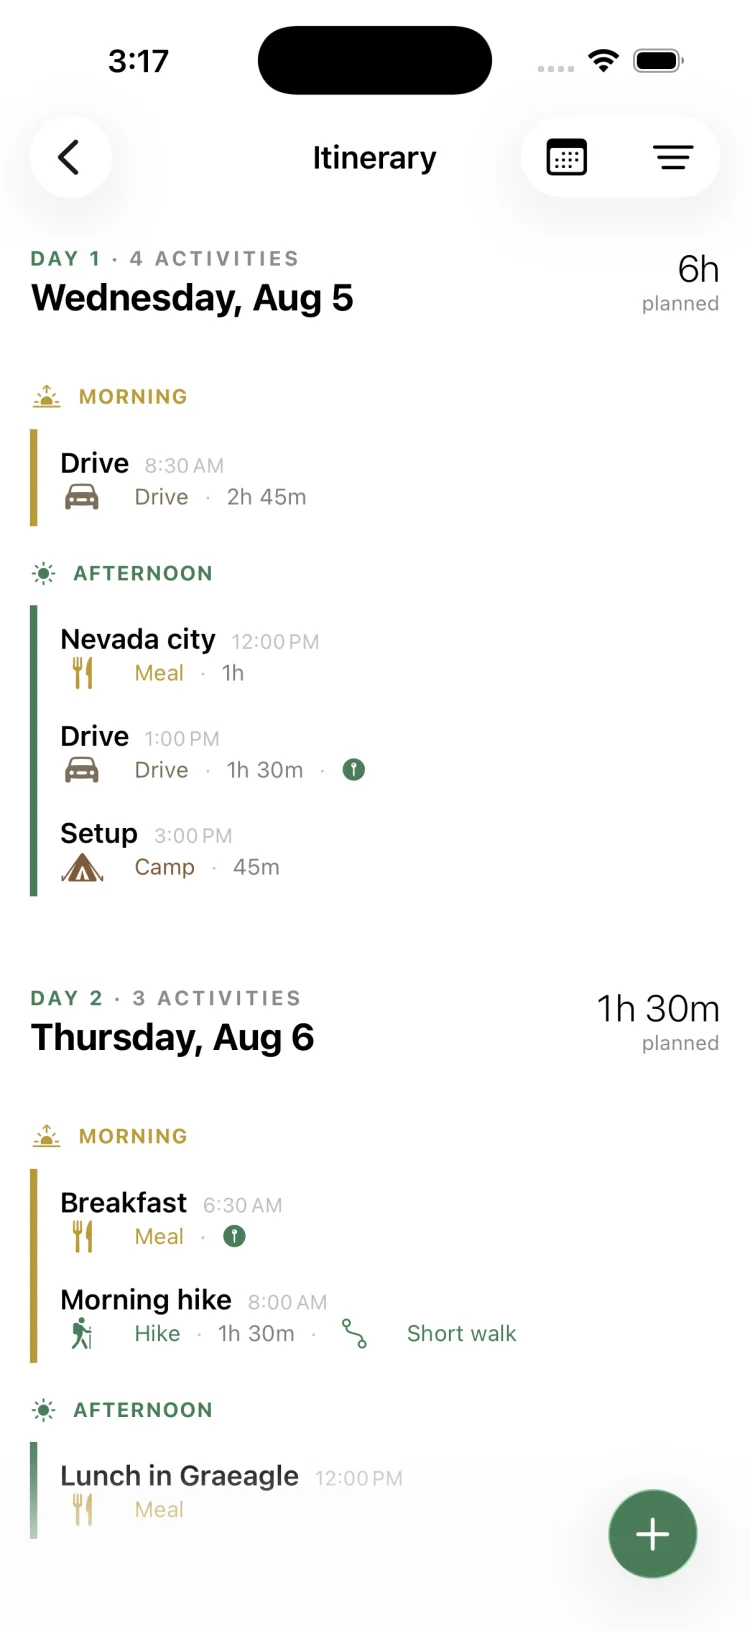
Turn a route into a day-by-day plan you can actually follow:
- Create a trip and pick Backpacking as the trip type — GoVenture loads a starter gear template for it.
- Add your route, or import a GPX file, and attach it to the trip.
- Open the Itinerary tab and add each day's activities with start times and durations.
- Drop waypoints for camps, water sources and junctions so the schedule ties to real places on the map.
4. Sort permits, reservations and fees
Permits decide your dates, so check them early. In the United States, most popular wilderness areas and national parks require a wilderness or backcountry permit for overnight trips, and the busiest ones run a lottery months in advance. Some also require a separate trailhead parking pass, a campsite reservation, or an approved bear canister.
Work through this list for your specific destination:
- Overnight/wilderness permit — often zone- or camp-specific, sometimes lottery-based.
- Trailhead parking — day-use fees, recreation passes, or limited overnight spots.
- Campsite reservation — required in many parks even in the backcountry.
- Fire restrictions — check current status; assume a stove-only trip if unsure.
- Food storage rules — approved canisters are mandatory in some areas, not merely suggested.
Save the confirmation. Rangers do check, and a permit you cannot produce is a permit you do not have. Keep a photo or PDF on the phone, not only in email you may not be able to load without signal.
5. Build the gear list — and weigh it
Do not pack from memory. Start from a category checklist so you catch the things that are easy to forget, then subtract rather than add. The categories that matter:
- Shelter and sleep — tent or tarp, sleeping bag or quilt, pad.
- Pack and carry — backpack, liner, compression sacks.
- Kitchen — stove, fuel, pot, lighter, spork, food storage.
- Water — filter or treatment, bottles or bladder, capacity for the longest dry stretch.
- Clothing — worn layers, insulation, rain shell, sleep socks.
- Navigation and electronics — phone, offline maps, battery bank, headlamp.
- Safety and repair — first aid, repair tape, knife, emergency communicator.
Then weigh it. Not roughly — actually. Your base weight is everything in the pack excluding food, water and fuel, and it is the number that predicts whether day three hurts. Most people are carrying two to four pounds of things they will never touch, and they only find out when they weigh each item individually. The full method is in the base weight guide, and a category-by-category checklist with typical weights is in the complete backpacking gear list.
Doing this in GoVenture
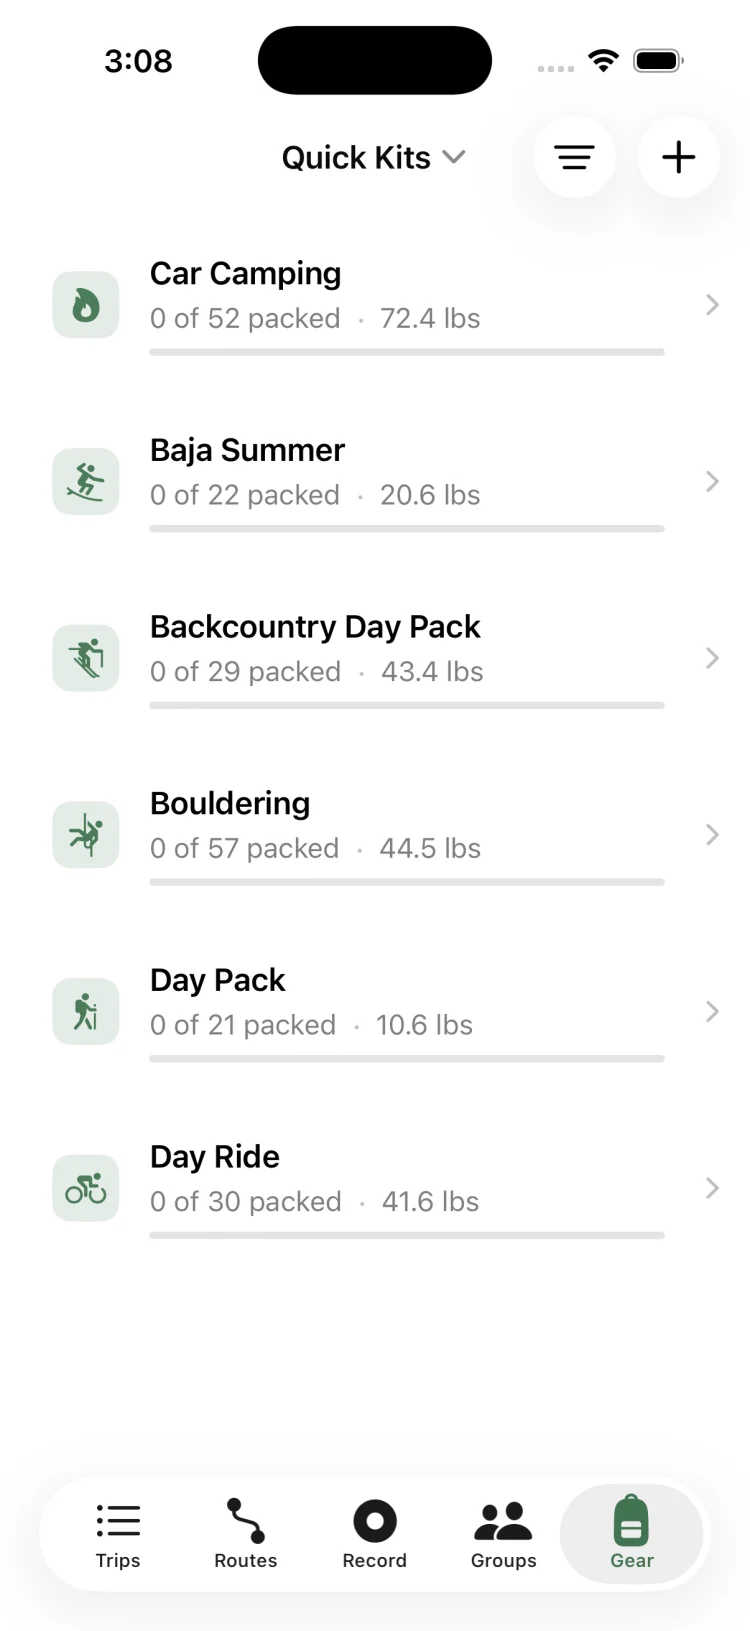
Build the list once, reuse it forever:
- Open Gear and add your items with weights — this becomes your permanent inventory.
- Group the items you always take into a Quick Kit (sleep system, kitchen, first aid).
- Add the Quick Kits to the trip in one tap, then add the trip-specific extras.
- Check the running pack weight total and cut from the heaviest category first.
If you are going with other people, do this step together. The single biggest weight saving on a group trip is not buying lighter gear — it is not carrying four stoves, three water filters and two first aid kits for a group of four. See the group trip planning guide for how to divide shared items without anyone double-packing.
6. Plan water, food and resupply
Water is the constraint that most often forces a plan change mid-trip. Before you leave, mark every known source on the route and note the longest gap between them. Then work out what you need to carry across that gap: roughly half a litre per hour of moderate hiking, up to a litre per hour in heat, plus two litres for a dry camp with cooking.
Seasonal sources are the trap. A spring that flows in June may be dry in September. Check a recent trip report rather than trusting the map alone, and always carry treatment even if every source looks pristine.
For food, plan by day and by meal rather than by feel. A rough target is 2,500–3,500 calories per person per day for moderate backpacking, and around 1.5–2 pounds of food per person per day. Pack each day's food in its own bag so you can see immediately whether you are ahead or behind, and repackage everything out of boxes to save volume and weight.
7. Download offline maps before you leave
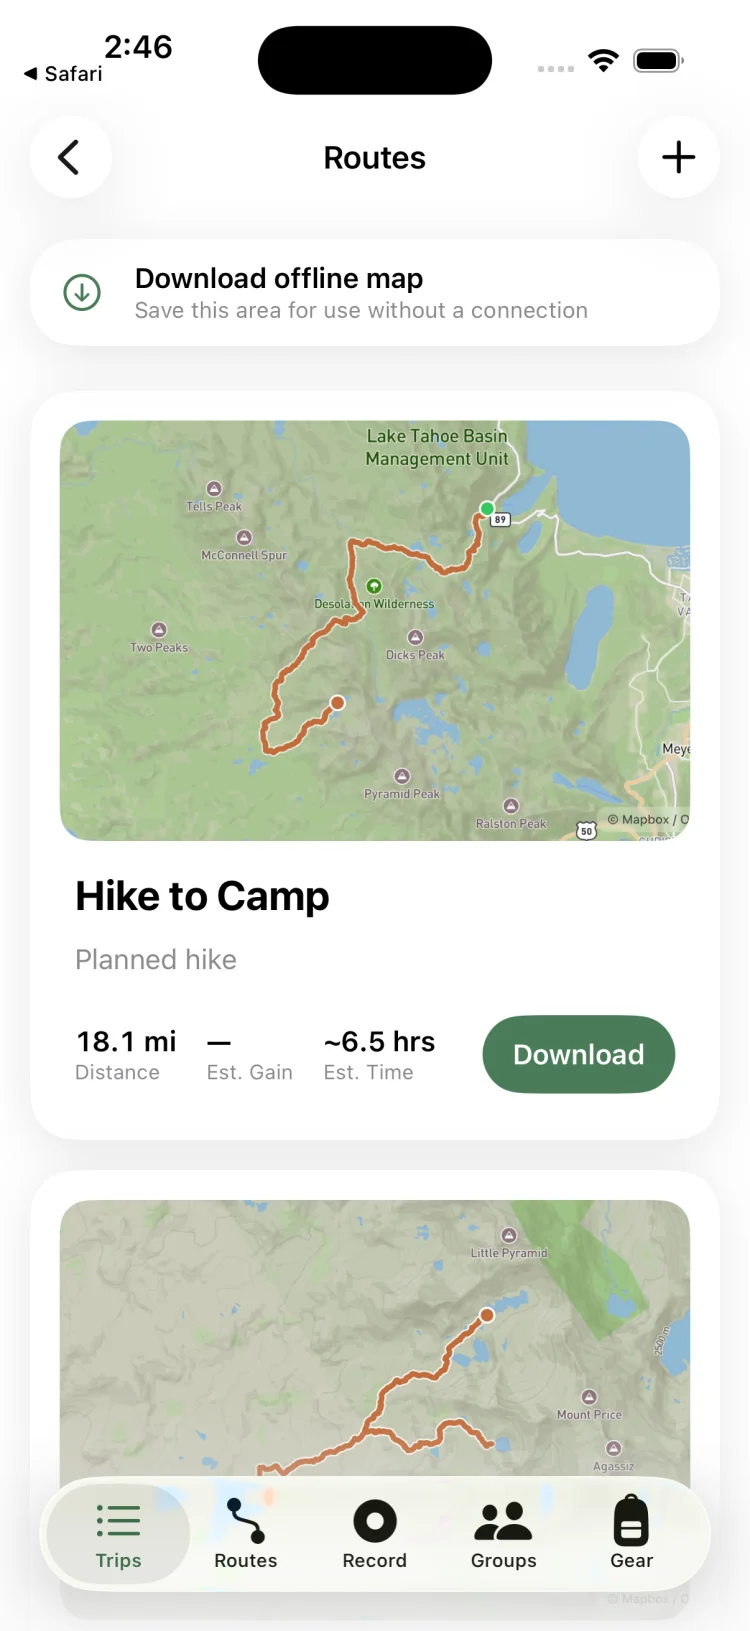
Your phone is a capable GPS unit — it uses satellite positioning, not cell towers, so it can locate you with zero bars. What it cannot do without signal is download map tiles. That is why people find themselves with an accurate blue dot floating on a grey rectangle.
Download the map area for your whole route while you are still on Wi-Fi, and download a margin around it — you want coverage for the bail-out routes and the side trail you might take, not just the line you drew. Then put the phone in low power mode and airplane mode on the trail; a phone hunting for a nonexistent tower is the fastest way to kill a battery.
The full process, including how much storage to expect and what to do about battery, is in the offline maps for hiking guide.
8. File a trip plan with someone at home
This is the step people skip, and it is the one search and rescue teams wish everyone did. A trip plan is a short message to a person who is not coming, containing:
- Your route and the camps you intend to use each night.
- Trailhead location and the vehicle you left there, with plate.
- Everyone in the group and any relevant medical information.
- Your expected return time — and the time after which they should call for help.
- The number to call: the local sheriff's office or park dispatch, not 911 from three states away.
Set the "call for help" time deliberately late enough to absorb a slow exit but early enough to matter — typically your expected return plus six to twelve hours. Then actually check in when you get out. The detailed template is in the hiking trip plan and safety guide.
A realistic planning timeline
Compress or stretch this depending on how contested your destination is.
| When | What you do |
|---|---|
| 3–6 months out | Lock dates and group. Enter permit lotteries. Book flights or long drives. |
| 4–8 weeks out | Finalise the route and daily segments. Confirm permits. Start training hikes with a loaded pack. |
| 2 weeks out | Build the gear list, weigh everything, divide group gear. Test any new equipment at home. |
| 1 week out | Buy and repackage food. Watch the forecast. Confirm the trailhead is open and the road is passable. |
| 2 days out | Download offline maps. Charge everything including the battery bank. Send the trip plan. |
| Morning of | Final weather check, pack weigh-in, check-in with your home contact. |
Keep it all in one place
Every step above produces information, and the failure mode is that the information ends up in six places: the route in one app, the permit in email, the gear list in Notes, the itinerary in a spreadsheet, the group's questions in a text thread, and the weather in a browser tab. Then someone asks "who's bringing the stove?" at the trailhead.
GoVenture exists to collapse that. One trip holds the route, the offline map, the day-by-day itinerary, the gear list with weights, the waypoints, the weather forecast for the trip dates, and — if you are going with people — a shared packing list where each item is assigned to a person. Nothing gets packed twice, and nothing gets left behind because two people each assumed the other had it.
Plan your next trip in GoVenture
Free on iPhone and iPad, with unlimited trips, itineraries, gear lists and group planning. Pro unlocks route drawing, unlimited gear lists, offline map downloads and extra map styles.
Download on the App Store →Frequently asked questions
How far should you hike per day when backpacking?
Most beginners should plan 5 to 8 miles per day with a full pack; experienced hikers manage 10 to 14 on moderate terrain. Add about 30 minutes for every 1,000 feet of gain, and make day one shorter than the rest so you are not setting up camp in the dark.
How far in advance should you plan a backpacking trip?
Two to four weeks for a local trip; three to six months for anywhere that runs a permit lottery. Permits are the hard constraint — check them before you book travel or take time off.
What should a first-time backpacker plan for?
One night, a well-marked trail under eight miles round trip, water at camp, and a realistic bail-out. Borrow expensive gear rather than buying it, and aim to keep base weight under about 20 pounds.
Is there an app to plan a backpacking trip?
GoVenture is a free iPhone app built specifically for this. It keeps the route, itinerary, gear list with pack weight, offline maps, waypoints and shared group packing in a single trip, so you are not stitching the plan together from four different tools. Compare it with the alternatives here.