A friend sends you a GPX file of the trail. You tap it in Mail. iPhone opens a page of angle brackets and coordinate strings. Or it asks what app to use and does not list any of the ones you have. This happens because iPhone does not natively understand GPX files — they are an industry-standard GPS data format, but Apple never built a handler for them. Here is how to actually open one and turn it into a usable route.
The short version
Save or open the GPX file, tap Share, pick your navigation app. The app imports the track and shows it on a map. Add waypoints, download offline maps, check the direction matches your plan.
What is a GPX file?
GPX stands for GPS Exchange Format. It is an XML-based file format used to store GPS data: waypoints (single points with names and coordinates), tracks (a breadcrumb trail of recorded movement), and routes (a planned sequence of waypoints defining a path). The file is human-readable text — if you open it in a text editor, you will see coordinate pairs, elevations, timestamps and metadata wrapped in XML tags.
Most GPX files you encounter in the wild are tracks — someone recorded a hike with a GPS watch or phone, then exported the data as a GPX file. The track is a sequence of hundreds or thousands of closely spaced GPS points showing exactly where that person walked. You import the track into your own app and use it to follow the same route.
GPX is the standard because it is platform-agnostic. A GPX file exported from a Garmin watch will import into an iPhone app. A track downloaded from a hiking website will work in any navigation software that supports GPX. The format is open and widely supported — except, notably, by iPhone's built-in apps.
The difference between a GPX track and a GPX route
This distinction matters when you are importing data and trying to understand what you are looking at.
A GPX track is a recorded log of where someone actually went. It has a timestamp for each point, often at one-second or five-second intervals, and the points are very close together — sometimes only a few meters apart. A track is a historical record. It shows what happened, not what was planned. If the person got lost, took a detour, or backtracked, the track shows all of that.
A GPX route is a planned path, usually with far fewer points — just the key waypoints that define the intended direction: trailhead, junction, summit, camp, exit. A route does not have timestamps. It is prescriptive, not descriptive. Most navigation software will try to snap a route to trails or roads when you import it.
In practice, almost every GPX file you download from a guidebook site, a trail association, or a friend is a track, because it was recorded by someone who walked the trail. When you import it, the navigation app usually treats it as a track and displays the exact path. You can then convert it to a route or just follow the track line directly.
Where GPX files come from
Before you import a GPX file, it helps to know where it originated, because the source affects how trustworthy and current the data is.
- Trail associations and land agencies. Parks, forests, and trail organizations often publish official GPX tracks for popular routes. These are usually accurate and up to date with current trail conditions.
- Guidebook and route-sharing websites. Sites that aggregate hiking routes let users upload and download GPX files. Quality varies — some are professional, some are a random hiker's recording from five years ago.
- Strava, Garmin Connect, and other training platforms. If someone shares a hike or ride, you can usually export the activity as a GPX file. These are recorded tracks with full detail.
- GPS watch or bike computer exports. Devices from Garmin, Suunto, Wahoo and others all export GPX. The data is as accurate as the device's GPS receiver.
- A friend who hiked the route. Someone sends you the GPX file from their phone or watch. You are trusting that they did not get lost.
Always cross-check a downloaded GPX track against a current map and recent trip reports. Trails get rerouted, bridges wash out, and a GPX file from 2019 may route you through a closure.
How to import a GPX file on iPhone
There are four common ways a GPX file ends up on your phone. Here is how to import from each one.
From an email attachment
- Open the email containing the GPX file.
- Tap the attachment. iPhone will preview the file — usually as raw XML text, which is not useful.
- Tap the Share icon (the square with an arrow pointing up).
- Scroll through the share sheet and select your navigation app (e.g., GoVenture, Gaia GPS, AllTrails, etc.).
- The app opens, imports the GPX track, and displays it on a map.
If your app does not appear in the share sheet, scroll right to the end and tap More to enable it.
From the Files app or iCloud Drive
- Save the GPX file to Files or download it to iCloud Drive.
- Open the Files app and navigate to the file.
- Tap the GPX file. If you have a navigation app installed, the system may offer to open it directly in that app.
- If not, tap the file once to select it, then tap Share and choose your navigation app.
From AirDrop
- Accept the AirDrop transfer. The GPX file saves to your Downloads or Files.
- Open Files, locate the file, and share it to your navigation app as above.
Some navigation apps can accept a GPX file directly via AirDrop if they have registered themselves as a GPX file handler. In that case, tapping Accept immediately opens the app and imports the track.
From a download link in Safari
- Tap the download link on the website. Safari downloads the GPX file.
- Tap the Downloads icon in Safari (top-right) to see the file.
- Tap the downloaded GPX file and choose Open in… then select your navigation app.
Some trail websites offer a direct "Open in app" button that bypasses the download step and sends the GPX data straight to a compatible app. Use that if available.
Doing this in GoVenture
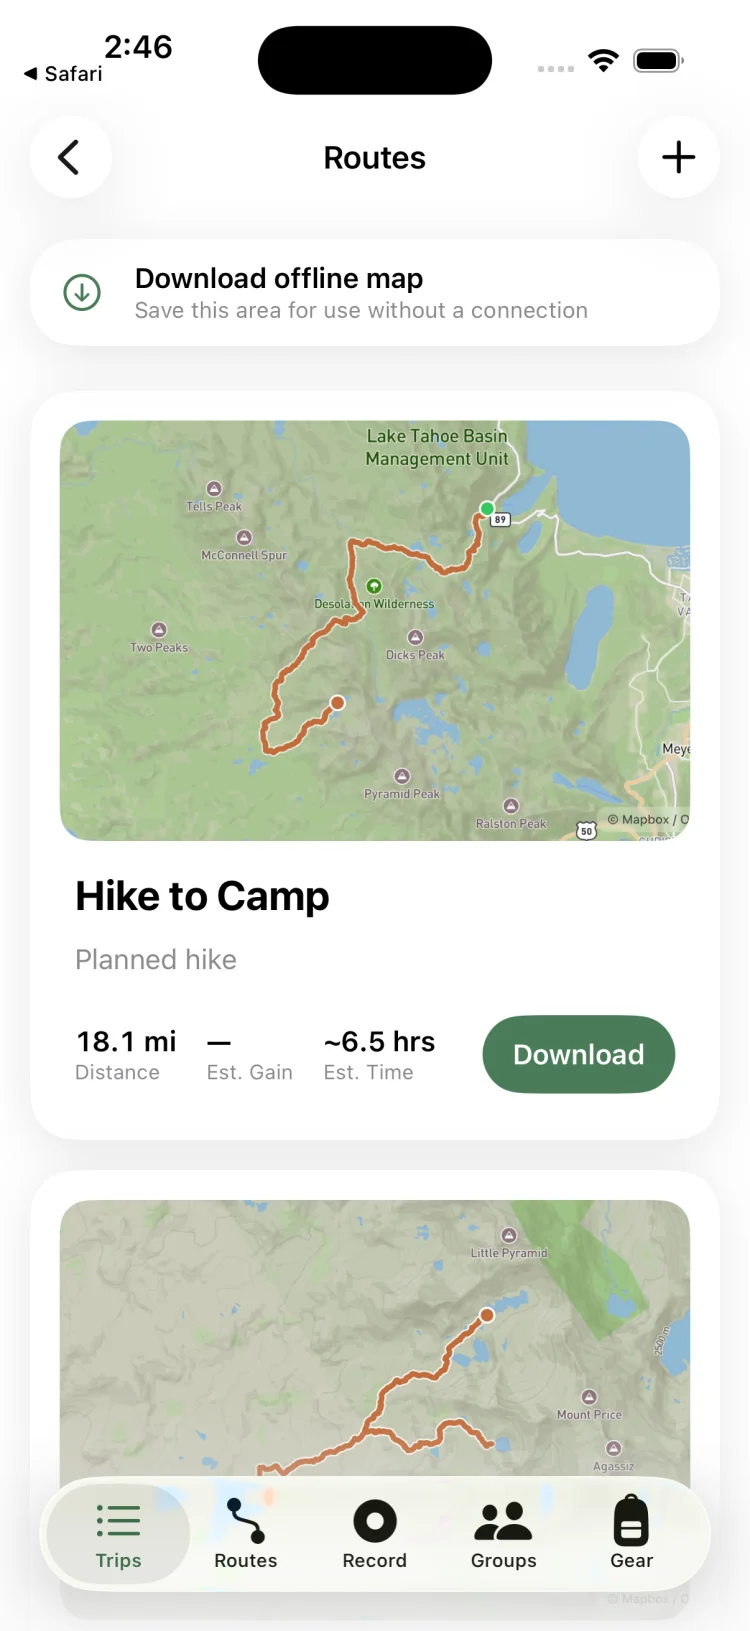
Import a GPX file and preview the route before adding it to a trip:
- Open the GPX file from Mail, Files, or AirDrop and tap Share → GoVenture.
- GoVenture opens with a preview map showing the imported track, total distance, and elevation profile.
- Review the route to make sure it matches the trail you intend to hike.
- Tap Save to add the route to your library, then attach it to a trip.
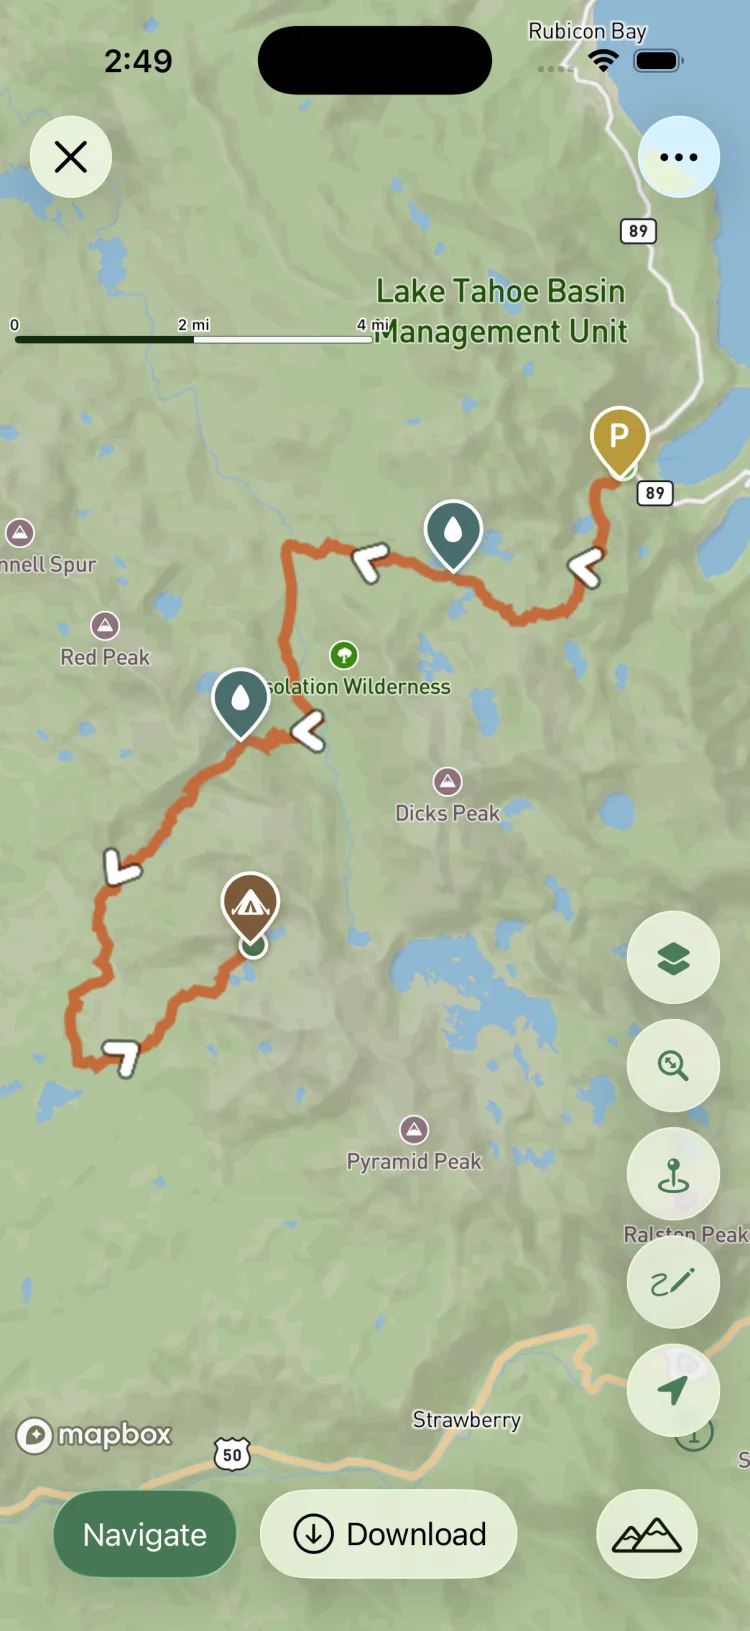
- Add waypoints for camps and junctions, then download the offline map region.
What to check after importing the track
Once the GPX file is imported and displayed on the map, do not assume it is correct. Verify these details before you rely on it in the field.
Does the track match the intended trail?
Zoom in and compare the imported track to the underlying trail on the map. Does it follow the named trail you intend to hike? Or does it veer off onto a different path, a road, or cross-country terrain? GPX files are sometimes mislabeled, and you need to catch that now, not at mile five.
Is the track going the right direction?
Tracks are recorded in a specific direction. If the person who recorded it hiked the trail clockwise and you plan to go counterclockwise, the track will be reversed relative to your plan. Some apps let you flip the direction; others do not. Check the start and end points and make sure they align with your trailhead and exit.
Check the elevation profile and total distance
Most navigation apps display an elevation profile and total distance for the imported track. Compare those numbers to what you expect from the trail description. A 12-mile loop should not import as 18 miles — if it does, the GPX file may include an approach road, a side trail, or a detour the original hiker took.
Look for obvious errors or gaps
Zoom in on sections of the track. Do you see straight lines cutting across terrain where a trail should switchback? That is a GPS signal drop. Do you see tight loops or zigzags that do not match the trail? That is GPS noise or someone wandering around camp. Most tracks have minor imperfections; large errors mean the data is unreliable.
Turn the track into a navigable trip
A GPX track is a line on a map. To use it for real navigation, you need to add waypoints and download offline maps so the route is usable when there is no signal.
Add waypoints for key locations
A waypoint is a named point on the map: trailhead, junction, water source, camp, summit, bail-out. Drop a waypoint at every decision point on the route so you can navigate to it directly and know when you have reached it. If the GPX file already includes waypoints, check that they are labeled correctly and positioned where you expect them.
Download the offline map region
Once the route is saved, download the offline map area covering the track plus a buffer zone around it. GPS works without cell service, but map tiles do not — if you do not download them ahead of time, you will have the route line and waypoints but no topographic background. See the full process in the offline maps for hiking guide.
Attach the route to a trip with itinerary and gear
In a trip planner like GoVenture, you can attach the imported route to a trip, then add a day-by-day itinerary, gear list, and weather forecast. That turns the GPX file from a static track into a complete plan you can follow and share with the group. See how to plan a backpacking trip for the full sequence.
Troubleshooting common GPX import problems
The file opens as text or gibberish
You tapped the GPX file and iPhone displayed a page of XML code. This is because you opened it in a previewer or text editor instead of importing it into a navigation app. Go back, tap Share, and choose your navigation app from the list.
The file is a .zip or .kml instead of .gpx
Some websites deliver GPX files inside a zip archive, or they provide the data as KML (Google Earth format) instead. If the file is zipped, save it to Files, tap it to extract, then open the extracted .gpx file. If it is a .kml file, you need a converter or a navigation app that accepts KML directly. Most trail apps expect GPX, not KML.
The track is reversed or upside down
The person who recorded the GPX track hiked it in the opposite direction from your plan. Some apps let you reverse a track; others do not. If the app cannot flip it, you can still follow the line — just navigate it backward, or re-download the GPX file from a source that recorded it in your intended direction.
The file is huge and the app is slow
A GPX track recorded at one-second intervals for a long hike can contain tens of thousands of points. Some apps struggle to render tracks that large. Look for a "simplify" or "reduce points" option in the app settings, or use an online GPX simplification tool to reduce the file size before importing. A simplified track with one point every 10–20 meters is usually fine for navigation.
The track does not appear on the map after import
The import succeeded, but the app is zoomed to the wrong area or the track is hidden. Zoom out and pan around, or use a "fit to route" or "center on track" option if the app has one. Check the app's route list to confirm the file was actually imported.
No GPX file available?
If the trail you want does not have a GPX download, you can draw the route manually on a map in most navigation apps. Use the trail layer as a guide, trace the route, then save it. It takes longer, but the result is the same.
Import GPX files in GoVenture
GoVenture is a free iPhone trip planner with GPX import, route preview, waypoints, and offline topo maps. Import a track from email or Files, attach it to a trip, and navigate with GPS in the field.
Download on the App Store →Frequently asked questions
Why can't iPhone open a GPX file?
iPhone has no built-in GPX handler. GPX is an XML file format used for GPS data, and iOS does not natively recognize it. When you tap a GPX file in Mail or Files, the phone either shows the raw XML text or asks what app to use. You need a third-party navigation or mapping app to import and render the GPX track.
What is the difference between a GPX track and a GPX route?
A GPX track is a recorded breadcrumb trail — a sequence of GPS points from a past hike or ride, often with thousands of closely spaced coordinates and timestamps. A GPX route is a planned path with fewer waypoints defining the intended direction of travel. Most downloaded GPX files from guidebooks are tracks, not routes, because they were recorded by someone who walked the trail.
How do I import a GPX file from email on iPhone?
Open the email, tap the GPX attachment to preview it, then tap the share icon and choose your navigation app from the share sheet. The app imports the file and displays the track on a map. If the share sheet does not show your app, scroll right and tap More to enable it.
Can I open a zipped GPX file on iPhone?
Yes, but you have to unzip it first. If the file is a .zip archive, save it to Files, tap it to extract, then open the extracted .gpx file and share it to your navigation app. Some apps can import directly from a zip, but most cannot.